Pages

Wednesday, March 30, 2011

Photography Assignments

Want to improve your knowledge of photography but don't have the time to go to school? Ree Drummond's website also known as The Pioneer Woman gives you a chance to take part in her Photography Assignments and win big prizes. She even gives away awesome camera gears, and equipment if your photograph gets chosen. It's a great opportunity to challenge yourself and take pictures of specific subjects, as well as improve your knowledge in photo editing. Click here to be redirected to her photography section. 

She also has the most awesome step-by-step recipes for all you food lovers out there. What are you waiting for?!? 
photo of Ree Drummond from thepioneerwoman.com

how to make a ruffle cake


How much do you love these ruffle cakes? The very talented ladies of Sweet and Saucy Shop had put together a video to show how you can make them. Watch! 
love, love, love!!


Recipe for Swiss Meringue Buttercream

Ingredients

  • 2 1/2 cups sugar
  • 10 large egg whites
  • 4 cups (8 sticks or 2 pounds) unsalted butter, cut into pieces
  • 2 teaspoons pure vanilla extract

Directions

  1. Place sugar and egg whites in the heat-proof bowl of an electric mixer. Set bowl over a pan of gently simmering water, and whisk until sugar has dissolved and egg whites are hot to the touch, about 3 minutes. Test by rubbing the mixture between your fingers; it should feel completely smooth.
  2. Transfer bowl to mixer stand. Using the whisk attachment, beat on high speed until mixture has cooled completely and formed stiff and glossy peaks, about 10 minutes.
  3. Add the butter, one piece at a time, and beat until incorporated after each addition. Don't worry if the buttercream appears curdled after all the butter has been added; it will become smooth again with continued beating. Add vanilla, and beat just until combined.
  4. Switch to the paddle attachment, and beat on the lowest speed to eliminate any air pockets, about 5 minutes. If using buttercream within several hours, cover bowl with plastic wrap, and set aside at room temperature in a cool environment. Or transfer to an airtight container, and store in the refrigerator, up to 3 days. Before using, bring buttercream to room temperature, and beat on the lowest speed with the paddle attachment until smooth, about 5 minutes.


    Recipe from MarthaStewart.com

Tuesday, March 29, 2011

travel themed engagement session

A sneak peek from today's engagement session. More to come =)

Sunday, March 27, 2011

sunday, sunday, the day after saturday... :P

Hey, my rock crystals are actually forming! Woohoo!!! 
It might take another week though :( 
Oh well, how's your weekend???
I'm off for six days! and engagement photo shoots are coming =) Hoping for better, non-deceiving sunny days in Toronto!

Thursday, March 24, 2011

yummy rainbow cookies

Actually, the recipe calls for chocolate chips, after all, it is a chocolate chip cookie recipe. But I don't have chocolate chips so I used rainbow coloured candy coated chocolate bits.

Here's the recipe: 

2 cups all-purpose flour
1/2 teaspoon baking soda
1/2 teaspoon salt
3/4 cup unsalted butter, melted
1 cup packed brown sugar
1/2 cup white sugar
1 tablespoon vanilla extract
1 egg
1 egg yolk
2 cups semisweet chocolate chips (or in this case, candy coated chocolate bits)

Directions:
Preheat oven to 325 degrees.
Sift flour, baking soda and salt; set aside.
Cream together melted butter, brown sugar and white sugar until well blended.
Beat in vanilla, egg and egg yolk until light and creamy.
Mix in the sifted ingredients until just blended. Stir in chocolate chips by hand using a wooden spoon.
On a baking sheet, drop spoonfuls and make sure they are at least 3 inches apart.
Bake for 15-17 minutes.


Makes 24 cookies. 


I think I need a tall glass of milk!

Wednesday, March 23, 2011

updates

So much for attempting to blog daily! Sigh. Regular day job gets in the way of everything =P

Anyway, I think my rock candy experiment will take longer than anticipated. I mean look at this....
 It looks like it's starting to form huh? But it's been TWO days! I have to remind myself to have patience!

Sunday, March 20, 2011

making rock candy

So I saw a video of how to make rock candy and I really want to try it. This is a weeklong project as we wait for the rock crystals to form so I'll be updating daily to see if we are successful or not. Anyway, aside from water and sugar. You need these food colour and flavourings. 

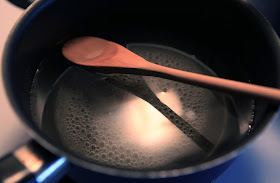
 Boil 2 cups of water.
Add 4 cups of sugar and stir with a wooden spoon. 

 Keep stirring until all the sugar is dissolved and the solution is clear. Remove from heat and transfer to your prepared jars. 
 Add the food colour and flavours, and dip the prepared skewers into the solution. 
 Roll the skewers in sugar. 
 Allow it to dry. Now this part is very important as the sugar crystals on the skewer will act as a base for the sugar crystals to form
 Return the skewers into the jars and make sure the skewer doesn't touch the bottom of the jar. Cover the jars with a sandwich bag and wait. The rock crystals should begin to form within 4-6 hours. Allow the skewers to soak for at least a week. You may have to clean the top of the solution as crystals begin to form. 
I'm excited to see how this will turn out! I guess patience really is a virtue! 

Saturday, March 19, 2011

lazy lounging saturday

I love lazy lounging Saturdays. I think I've just gained back the 12 lbs. I lost when I got sick. Chicken wings for last night's dinner, red velvet cake for breakfast and beef and heavily cheesed nachos for lunch. I guess I deserve a no-counting calories day at least every once in a while, considering how little I've been eating the last few months. I've been really good in keeping the weight off, and watching my food intake. I hope I can increase my activity level as well. Hopefully, spring is coming soon and we'll be running outside again in no time. It was nice today, deceivingly sunny and still slightly cold but nice enough to do outdoor activities I guess, except I spent half the day dozing off and watching TV all day --- truly a relaxing and worry free day.

Some random thoughts:
- I hate people on Facebook who has nothing better to post but complain about Canadian weather. I mean, seriously! I've had about enough of your whining about how cold it is and how much you can't stand winter. What did you expect? If you're so unhappy, maybe you should move somewhere else! Geez! I guess the same could be said about me. If you're so sick of weather-themed Facebook updates, get off Facebook! Haha...
- Okay, now that's out of my system, I seriously want to learn how to ride a bike. Just seems like something fun to do in the summer time :)
- I love LivingSocial deals. Have you checked it out yet? They have the most amazing spa deals (they have other stuff too, great discounts to your local stores). Check it out and you'll see what I mean.
- I love that you can google pretty much everything on the planet. Anything you've ever thought of -- type it. You'll be amazed at what you'll find.
- I have a weeklong project in mind. I can't tell you just yet, but I'm very excited so I'm sure you'll find out soon enough :)
- I haven't done our taxes!!
- I wanna go somewhere. Not forever, just for the time being. And no, I'm not complaining about the weather. I just want a mini trip somewhere and looking up trips on travel websites isn't exactly helping. Do you know it's only $649 to fly from Toronto to Paris return. Yes, I said return with taxes included! Yup! Check out Air Transat. Now!
- I've blogged the most this month than any other month. Woohoo! Hopefully, I can keep doing this daily blogging thing :p

Anyway, enough about my random stuff. How are you spending your Saturday? Are you watching the supermoon??

and the winner of our photojojo contest is..........

Red velvet cake for breakfast! yum yum yum....
 Anyway, enough stalling. I guess I can use a random integer generator but this is more fun :)

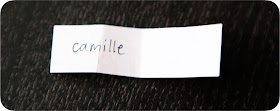
Congratulations, Camille! Please email me for your contact info. The photojojo felt camera case is on its way to my doors. I will contact you as soon as I ship it out. Thanks everyone for joining our contest =)

mmm...good!

Why is red velvet cake so good?? I made a cake out of the leftover batter from the cupcakes I made. I didn't have enough icing to coat the cake so I didn't bother to take a picture of my messed up icing job =P
While waiting for A to come home from work, I asked him to stop by the grocery store to buy some vegetable oil and he came home with these. I think I should send him on random errands more often :)

Friday, March 18, 2011

diy fridays: making a belly band for your invitations

As a request by Camille, here's a diy about making a belly band for your invites.

Making a belly band for your invitations can be as simple as having the right paper and a paper cutter. Really. Depending on the size of your invitation, an 8.5 x 11 is usually okay. You can also use a 12x12 cardstock/scrapbook paper like this.

An even easier option is using a wide ribbon like this, and attaching your monogram or wedding label. 

To custom make your belly band like this one, here's a step by step using Word. 


1. Open your Word Document. Choose Landscape orientation from Page Setup under File
2. Using your Object tool, make a rectangle like I have done below. Change the Fill setting to none and Line setting to 0.5 and change the colour to light gray -- Just enough so you can see the line. These will be your guideline for cutting.

I've highlighted the text box tool and Object tool for your reference.

3. Now, using the text box tool, add your desired text. You can also add an image on the sides to make your belly band more interesting as shown in the above picture.

4. When you're finished with your design, choose Select All, and Copy your design to the rest of the page. You may be able to fit 5 or 6 in a page depending on the width of your belly band.
5. Now, you see those lines on the side that complete your rectangle? Sometimes, you don't want that to appear on your printing. What you can do is replace the rectangles with the Line Tool to make your straight lines like what I've done with this next picture.
6. For printing, you can use Vellum sheets like what I've done with this invite.


Here are the separate pieces to see them more closely. As you see, I used a picture of an acorn all around my belly band and used paper glue to connect them. I also used a ribbon on top of my belly band.
Here are more invite samples with belly bands


girly cupcakes

I baked some red velvet cupcakes yesterday for a birthday girl. I'm not sure what I was trying to achieve with the sandals in the sand...I just really wanted to use my cocktail umbrellas =) love 'em!
...and here's more of them

Thursday, March 17, 2011

creamy shrimp and spinach pasta

How do you know if your pasta is cooked?? My mom used to say, "if it sticks to the wall (or ceiling) when you fling it, it's cooked!" Hence, the explanation for this picture. =) Of course, you can also --- taste it! (duh! hehe) Anyway, I love my mom's sense of humour!

Anyway, I had some spinach and shrimp left in the fridge and I thought, I'm sure I can put together something to put these two to good use. Spinach is one of the healthiest vegetables and it's rich in so many nutrients including Vitamin A, Iron, Calcium, folic acid and many more. Remember the old Popeye and Olive cartoons? Spinach really is good for you =) 
I'm bored of the regular tomato sauce for spaghetti, so here's a creamy shrimp and spinach pasta recipe for you. 


Ingredients

10-12 medium shrimps
2 cups of spinach (I basically used half of the regular spinach bunch you get from the supermarket and cut them in smaller pieces)
4 cloves of garlic, minced
2 medium sized tomatoes, diced
1 tablespoon of butter
1/2 cup of milk
1 1/2 teaspoon of flour
1 chicken cube
salt and pepper to taste
1 slice of lemon

Directions:
  • Cook pasta as package directions suggests.
  • Sprinkle some salt and pepper on shrimp. 
  • Heat butter on a nonstick skillet over medium high heat. Add the minced garlic. Saute for about 30 seconds.
  • Add shrimp and saute for about 5 to 10 minutes. I like my shrimps well cooked, so cook it to what you desire. Add tomatoes.
  • Add the spinach and saute until cooked. 
  • Aside, mix 1/2 cup of milk and flour and stir to avoid clumping. Add to the skillet. 
  • Add the chicken cube and mix well. Season as desired. 
  • Squeeze some lemon before serving, or in my case, I added a little bit of orange rind. It adds quite a bit of flavour. 
  • Enjoy!

Tiffany locks and keys

After the successful launch of their Tiffany keys collection, Tiffany has also released a whole new set of Tiffany Locks. Check out Tiffany.ca for more details. Have you joined our Tiffany and Co. contest yet?? It's not too late. You'll have until June 7th, 2011 to join. 

st. patrick's day


They say music is the universal language and I couldn't agree more. In light of things that happen in our individual lives, we find commonality through the songs we hear and equally appreciate. Just to give you an example, in the winter of 2004, back when A and I were both single, we used to listen to this same song. It was playing in his car on a daily basis, and on my earphones during my everyday commute. How could we not? The lyrics goes like this...

Here comes the cold, 
break out your winter clothes, 
and find a love to call your own....

Coming out from pretty messed up relationships, we found each other and sure enough, "we're safe till St. Patrick's Day."


Glee-cap: Original Song

Unlike everyone else, I didn't actually get to watch this episode on Tuesday when it was shown on TV. Thank God, for Rogers on Demand, or for others, GlobalTV.com where you can watch full episodes of your favourite Global shows (did you know that??) Working shift work makes it so hard to follow any TV series so kudos to those who still manage to watch The Bachelor, Celebrity Apprentice or Jersey Shore. 

This review has spoilers so those who haven't seen it, you've been warned!


......aaannnndddd proceed!


Anyway, how intense was Tuesday's episode?? It seems obvious that Ryan Murphy has been pushing really hard to sell the Kurt and Blaine story, and the build-up towards that was amazing. The moments before the Kurt and Blaine kiss, where he was describing a defining moment --- I had one of those moments. It was beautifully done. Well done, Darren Criss! (by the way, he's not gay in real life. I'm not sure why this bit is important -- but I guess just for us heterosexual girls :P)

The Rachel-Quinn confrontation scene was intense. I know people are getting tired of this love triangle, but I totally get that feeling when Rachel walked out of the auditorium and struggled writing her original song. I've had one too many moments like this. "Get it Right" and "Loser Like Me" were quite catchy. Anyway, do you still remember this from Season 1??? How I long for a nice Rachel-Finn moment. I guess we'll have to wait till next season!

images through Google Image Search

Tuesday, March 15, 2011

what to do with day old bread

Seems such a waste to throw out bread, even if it is a day past its expiration date. I hate throwing out food, so here's a bread pudding recipe to extend the life of your old bread =)

Ingredients

  • 6 slices day-old bread
  • 2 tablespoons butter, melted
  • 1/2 cup raisins (optional)
  • 4 eggs, beaten
  • 2 cups milk
  • 3/4 cup white sugar
  • 1 teaspoon ground cinnamon
  • 1 teaspoon vanilla extract

Directions

  1. Preheat oven to 350 degrees F (175 degrees C).
  2. Break bread into small pieces into an 8 inch square baking pan. Drizzle melted butter or margarine over bread. If desired, sprinkle with raisins.
  3. In a medium mixing bowl, combine eggs, milk, sugar, cinnamon, and vanilla. Beat until well mixed. Pour over bread, and lightly push down with a fork until bread is covered and soaking up the egg mixture.
  4. Bake in the preheated oven for 45 minutes, or until the top springs back when lightly tapped.


Drizzling melted butter mmmm.....
I added 1 banana on my bread pudding before baking...and a tiny bit of caramel sauce before serving. Yum!

Monday, March 14, 2011

free: wedding invitation templates and diy wedding crafts


Are you a DIY bride? One thing I love about weddings is when the bride and groom personally take part in creating items to be used for their wedding. I think it makes weddings much more personal and really reflect the couple's personality. A and I did everything for our wedding (except for flowers, cake and photography). We made our invitations, wedding favours, escort cards, table numbers, menu, wish tree, wedding cd and even the gifts to give away to guests for the reception games. We loved that we were able to both contribute to the most important day of our lives.

Wedding Chicks is a great site for the DIY bride. The pictures above are just among the sample free invitation suites that can be downloaded from their website. Click here to go directly to their DIY and Downloads link.

Enjoy!