Showing posts with label pink loves chocolate paper products. Show all posts

Saturday, September 15, 2012

wedding photo book lay-out sneak peek!

Well, hello there! Almost a month since our last post! Sorry for the absence, as August was our busiest month wedding-wise, as well as a few family shots here and there. We've had such a fantastic time doing wedding shoots, now the real work begins. Our new photobook layouts and templates are simpler than they used to be, but gives off a more classic and elegant look. Here's a sneak preview from Amabelle and Mario's wedding. 


Watch out for more wedding posts the next few weeks =)

Tuesday, November 08, 2011

new: pink loves chocolate handmade cards!

pink loves chocolate handmade cards are making a comeback! Our dear friend's much awaited cake shop is opening soon, and these cards will be available for sale at her store. Check these out!


Cake Rolls scheduled "soft" opening is November 12, with a grand opening tentatively scheduled on November 19. Visit her soon at the corner of Shaver and Dundas Street in Etobicoke!

Friday, March 18, 2011

diy fridays: making a belly band for your invitations

As a request by Camille, here's a diy about making a belly band for your invites.

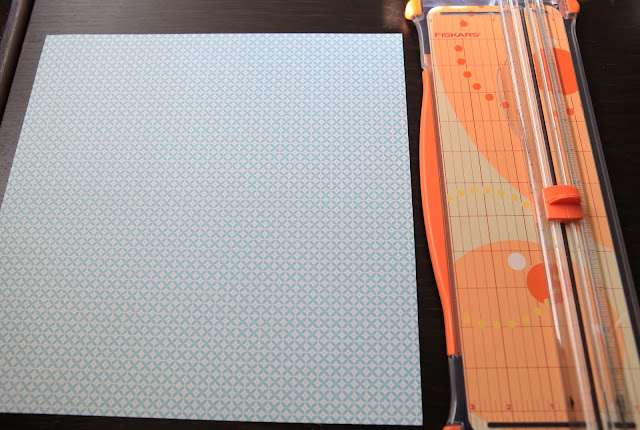
Making a belly band for your invitations can be as simple as having the right paper and a paper cutter. Really. Depending on the size of your invitation, an 8.5 x 11 is usually okay. You can also use a 12x12 cardstock/scrapbook paper like this.

An even easier option is using a wide ribbon like this, and attaching your monogram or wedding label. 

To custom make your belly band like this one, here's a step by step using Word. 


1. Open your Word Document. Choose Landscape orientation from Page Setup under File
2. Using your Object tool, make a rectangle like I have done below. Change the Fill setting to none and Line setting to 0.5 and change the colour to light gray -- Just enough so you can see the line. These will be your guideline for cutting.

I've highlighted the text box tool and Object tool for your reference.

3. Now, using the text box tool, add your desired text. You can also add an image on the sides to make your belly band more interesting as shown in the above picture.

4. When you're finished with your design, choose Select All, and Copy your design to the rest of the page. You may be able to fit 5 or 6 in a page depending on the width of your belly band.
5. Now, you see those lines on the side that complete your rectangle? Sometimes, you don't want that to appear on your printing. What you can do is replace the rectangles with the Line Tool to make your straight lines like what I've done with this next picture.
6. For printing, you can use Vellum sheets like what I've done with this invite.


Here are the separate pieces to see them more closely. As you see, I used a picture of an acorn all around my belly band and used paper glue to connect them. I also used a ribbon on top of my belly band.
Here are more invite samples with belly bands


Friday, October 29, 2010

Days 3 and 4: Recovery

It seems I needed a day to recover from Day 2. As we left from hot yoga that evening, I actually realized the theme of the day should have been "balance". It was invigorating, and probably just what my body needed. Will definitely go back, but probably not as soon as I hoped.

To feel better about not being able to go back, I baked bread and did some good old kneading...

I love the smell of freshly baked bread. It was perfect in the "melt in your mouth goodness" kind of way <3

I also spent time working on Photography contracts for this weekend's engagement sessions. Editing for the first half is underway. Meanwhile, I worked on some invitation projects and reconnected with Taylor.
A's been experimenting with filters and lighting. Ignore the blurry shot of our classic Kodak and take note instead of the pretty little heart-shaped lights. Love, love, love

Goal for tomorrow: Start my 10-paged paper. I think 4 days is procrastinating enough. Muskoka tomorrow night and Bermuda on Monday. =)

Monday, March 15, 2010

my two loves - sugar and paper!

What a busy two months! Lately, I've been feeling sooo bogged down. There's been hardly any time to just stop and think! I guess it's payback since I had such a laid back vacation where I hardly did or thought about work! I'm ending all my sentences in exclamation marks! That alone is a definitive sign of stress! (it's time for another vacation?? haha!) Don't get me wrong though. I am grateful. And after such an eventful vacation, I think I have more appreciation for life than ever before. Anyway....
Since I am waaay behind in vacay photos editing, I am taking a break to update on what I've been doing the last few months. Shall we?

I'm starting backwards 'cause it's easier to remember =P

I was working on these baby shower cupcakes for a dear friend. I had this idea to make chocolate swirls and I since I couldn't do too many things at once, I needed A's help to help me make them. He did an awesome job, didn't he?!
And since he was strangely successful, why stop there? He made these chocolate nests too!
A closer look...
My classic fondant booties with the heart applique on red velvet cupcakes. I thought the flags were brilliant! I never had to answer which one is which!
Here's some of them...
And some more! Props for A for such amazing photos!
In clear boxes! I get sooo excited about packaging!

I was also working on these cookie monster baby shower invites last weekend
And lastly, I am creating these invitation samples for two weddings we're covering in the summer. I think I love the idea of boxed invites now as much as I love pocketfolds. They're so elegant.
I love this pink and green theme!
Love the single flower! The orchid always makes everything more elegant.
With a different flower option in vibrant pink!
We also made Save the Dates for them using the engagement pictures we took. Will post them soon(ish!) haha.
And that's it folks! Lots to do in April with invitation projects, photoshoots and other stuff. Hoping I'd get better at updating as these are almost two months worth!

Thursday, January 07, 2010

mmm...beef!

Woke up early to start slow-cooking this beef in my trusty crock pot. In the Philippines, this recipe is called "nilagang baka" which literally translates to boiled beef? haha. Doesn't sound quite as appetizing, huh? It's very good though, and quite easy to make but if you want your beef nice and tender, then you better start early to have this in time for lunch. My mom makes the best beef stew and it always makes me so nostalgic everytime I try this recipe. With my crock pot set on HIGH, I poured about 2 quarts of beef broth. I peeled some potatoes and cut them into cubes and placed them into the pot. I also added 2 beef bouillon into the pot and about half a cup of fish fauce (patis). I told you, it's a Filipino thing =P
Before adding the beef, I sauteed some garlic and onions in a pan, and fried the beef bones (I used beef neck for this recipe. It had just about the right combination of meat and bones needed for the stew). When the beef is partly cooked and looks brown, I added them to the pot. The last thing was to add the bokchoy but only when the beef is fully cooked and tender. Look!
It's very good and A is quite pleased. =)
I'm working on a cookie monster themed invite and I'd like to share this with you. Isn't it the cutest??? I love cookie monster!

Tuesday, December 08, 2009

the cookie project

I guess it pays to practice baking cookies especially this time of the year. I had to make 8 dozen cookies and planning for their presentation was a pain. But I had so much fun even with a mangled finger (check last post). This is the cookie project I thought would never end!
A twist on classic shortbread
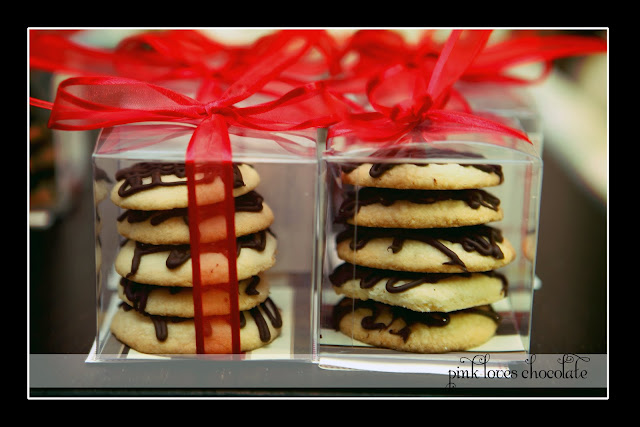
All wrapped and ready to go =)
Sorry, I can't get enough. I love these wrapped packages!
And of course, I had to make some decorated sugar cookies as well
This came about by accident. I had tinted cookie doughs without really planning what to do with them. I had these clear boxes and I thought, what better way to pack them than stacking them into a tree-like (more like cake-like) form. They are also less sweet than the other batch of sugar cookies I made so the cream cheese frosting in between was just perfect.
Again, excuse my love for good packaging. Won't these look cute as wedding favours?? Imagine them in white, or better yet, pink and chocolate =)
After much deliberation, here's the final Thomas the tank engine invites in cream-coloured lined linen envelopes.

Thanks August Empress for the cool background!