I'm doing this Photo-A-Day Challenge on Instagram and I'm having so much fun so far in doing some of the daily photo projects. For Day 4, I did some baking for a friends' daughter's 2nd birthday. Her party was pink lemonade themed. Here are some of our photos on Instagram. Love, love, love! Beautiful pink lemonade cake by The Caketress.
Showing posts with label pink loves chocolate cupcakes. Show all posts
Showing posts with label pink loves chocolate cupcakes. Show all posts
Sunday, May 06, 2012
Saturday, December 17, 2011
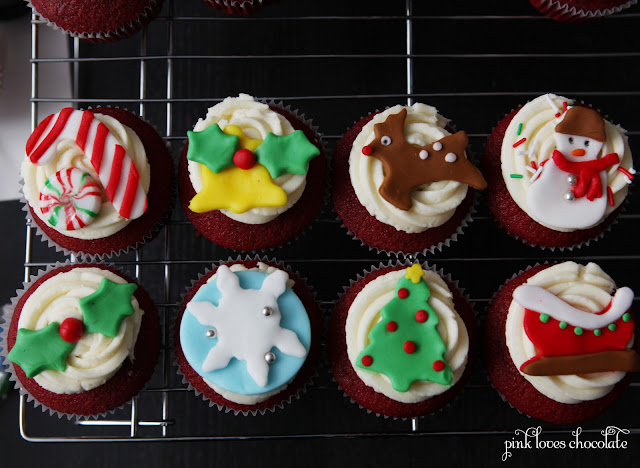
holiday baking
I've been doing quite a bit of baking lately. Some for birthdays and some holiday themed. At least the warmth of my oven is keeping me at home and not the warmth of shopping mall crowds hehe. Not that shopping wouldn't be awesome this time of the year =)
Football themed
For a Christmas party/Thomas the tank engine themed birthday party
This is supposed to be the little mermaid. Don't make fun haha =)
Friday, June 17, 2011
rainbow cake and pinwheels cupcakes :)
Haven't had a food update in a while....so today, I whipped something up, just for you =)
Ever since I saw Martha Stewart's Rainbow Cake recipe, I knew I had to try it someday. And boy how happy it made me =)
If you want to do this the easy way, (like I did) use white cake mix and Williams Sonoma's decorating pastes in primary colours.
I used a tiny 4inch cake pan and sliced them into two halves, which in the end yield two tiny cakes. My uneven layers haha but still, how much do you love these layers????
Excuse my messed up icing job, I ran out of icing for ambitiously thinking I can use one batch for two cakes! I love this rainbow cake!
love, love, love!
Click for Martha Stewart's recipe! Although, as I said, I used a white cake mix with homemade cream cheese icing. I also made these cupcakes today for a gender neutral baby shower. I love pinwheels =)
Labels:
desserts,
food,
home cooking,
love,
pink loves chocolate cupcakes,
recipes
Friday, May 27, 2011
comfort food
It's been raining almost everyday in Toronto but I refuse to be bogged down by this almost depressing weather. In times like this, it's nice to stay in and indulge in your favourite comfort foods. For me, it's cupcakes =) How can this sunny batch not bring a smile on your face, even on a gloomy day, like today?
I haven't cooked in a while, so here's a good old recipe for Filipino style chicken noodle soup!
Chicken Noodle Soup
Ingredients:
4 chicken breasts
4 eggs
3 cups of pasta (macaroni or shells)
5 pieces of chicken hotdogs (cut lengthwise and into half-moons)
2 medium sized carrots (cut into half circles)
3 stalks of celery
1 whole onion minced
4 cloves of garlic minced
2 tablespoons of butter
4 cups of milk
3 cups of chicken broth
3 chicken bouillon cubes
Directions:
1. Place the chicken breast in a large pot with 4 cups of water. Bring to a boil, or until the chicken is cooked and tender.
2. Drain the chicken. Save 3 cups of the broth in a bowl. Use a strainer to remove the fat and chicken bits. Cut the chicken into strips and set aside
3. In a separate pot, cook the pasta. In another pot, bring the eggs and the carrots to a boil. Drain and set aside.
4. Add the butter in a pan on medium heat. When melted, saute the garlic and onion. Add the hotdogs and chicken strips and cook until brown, and almost crispy.
5. Transfer in a large pot. Add the milk, chicken broth and chicken bouillon cubes.
6. Add the celery, carrots, hardboiled eggs and pasta.
So, go ahead. Bring your umbrella and enjoy the weather!
random shot from Madison Square Park
Friday, April 15, 2011
red velvet cupcakes
You must really love your job if you're celebrating your first year of being hired :P Congratulations to my sister! =)
diy: how to make dora cupcake toppers using fondant
A lot of people ask if I make my cupcake toppers from scratch and the answer is, yes! I started making them when I discovered my love for fondant. I love the idea of customized cupcake toppers, so I knew I needed to learn how to make them using cookie cutters and other fondant tools.
Ada from Winnipeg asked me if I can do a tutorial on how to make Dora cupcake toppers using fondant. I can't pretend to be the expert as I think my method still needs a lot of work and that my Dora cupcake toppers still need improvement in capturing the resemblance of these popular characters. But if you're interested in simple instructions on how to make somewhat recognizable Dora characters, here's the step by step instructions. The key thing is to use whatever tools you have available and to be creative! Tips and ends of cookie cutters can be very useful tools in moulding or making shapes for your cupcake toppers. And for course, a little patience goes a long way =)
For this project, you need dyed fondant in the following colours: black or brown for the hair, flesh/tan, light blue, yellow, white and red. Okay, ready?? Here we go....
Using your fondant rolling pin, flatten the black/brown fondant to your desired thickness
To start off, use a circular cookie cutter. This will be your base pattern for Dora's hair .
You don't necessarily have to use a tulip cookie cutter to make room for Dora's face. In fact, using Wilton's tools as in the second picture, you can cut out the pieces to make Dora's hair as seen in the next picture.
I used the tulip cookie cutter on the flesh toned fondant to cut out Dora's face. Using Wilton's tools, I straightened the edge of the top of her face before attaching her hair as seen in the next picture.
Using food color markers, draw Dora's face. I used red fondant for her lips.
HOW TO MAKE BOOT'S FACE
Using a flower cookie cutter and a circular cookie cutter, cut out the outline of Boot's face as seen in the picture above.
You may have to use your fondant roller or your hands to make the face more rounded and less jagged. To create his forehead and ears, use the flower cookie cutter and circular cookie cutter.
Put the flesh coloured fondant on top of the light blue fondant as shown above. To make Boot's facial features, roll balls of fondant for the ears, eyes and lips. I used edible food markers for his nose.
Using the other end of your Wilton tool, make indentations on Boot's forehead for his hair.
HOW TO MAKE "BACK PACK"
If you have a rectangular cookie cutter, use it. Otherwise, use your Wilton tool to make one. Roll a piece of light blue fondant for the pocket attachment.
Using the pointed tool, make indentations around the bag as shown in the picture.
Using yellow fondant, add the accents and facial features as shown above.
Roll a piece of light blue fondant for the handle.
HOW TO MAKE "MAP"
Using yellow fondant, cut out an upside down triangle.
Roll the triangle until you've reached your desired shape. You may have to cut out the edges if it seems too pointy. Add the map's facial features.
Here's all of them!
And here they are as cupcake toppers =)
Labels:
cool stuff,
desserts,
diy,
pink loves chocolate cupcakes,
tutorials
Friday, April 01, 2011
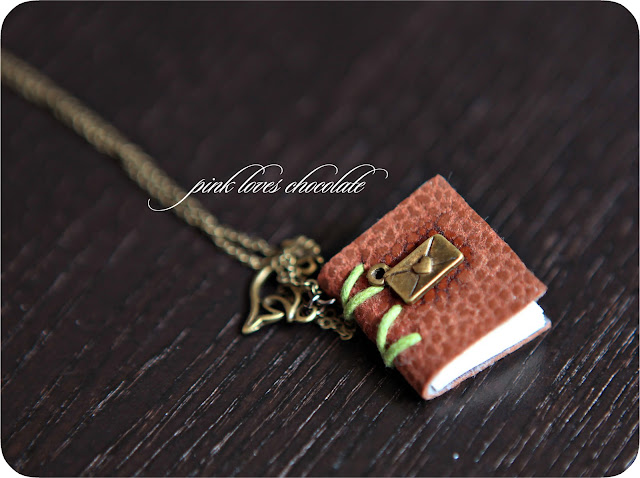
bookworm necklace
How much do you love these??? Love, love, love!
Anyway, I had to try and make it, even though mine doesn't look quite as nice.
I also made cupcakes today for a birthday girl.
Oh and look what I found in the mail today! <3
Labels:
cool stuff,
crafts,
desserts,
pink loves chocolate cupcakes
Friday, March 18, 2011
girly cupcakes
I baked some red velvet cupcakes yesterday for a birthday girl. I'm not sure what I was trying to achieve with the sandals in the sand...I just really wanted to use my cocktail umbrellas =) love 'em!
...and here's more of them
Tuesday, March 08, 2011
pancake tuesday!
Mmmm....haven't had these in a while...Pancake Tuesday sounds yummy! It might just become a weekly tradition =)
The Fluffy Pancake Recipe
Ingredients
1 1/2 cups all-purpose flour
3 1/2 teaspoons baking powder
1 teaspoon salt
1 tablespoon white sugar (optional)
1 1/4 cups milk
1 egg
3 tablespoons butter, melted
Directions
- In a large bowl, sift together the flour, baking powder, salt and sugar. Make a well in the center and pour in the milk, egg and melted butter; mix until smooth. Don't worry if it's a little lumpy, it'll all work out in the end =)
- Heat a griddle or frying pan over medium high heat with a little bit of butter/margarine. Pour or scoop the batter onto the griddle, using approximately 1/4 cup for each pancake. I usually wait for little bubbles to appear on the sides before flipping my pancakes, roughly around 3-4 minutes. Brown on both sides and serve hot.
- Wanna make it fancy? Serve it with fruit (strawberries or blueberries) and maybe a touch of whipped cream. Yum!
And some Marvel themed cupcakes for a mini superhero...
Labels:
food,
home cooking,
pink loves chocolate cupcakes,
recipes
Subscribe to:
Posts (Atom)
Thanks August Empress for the cool background!


